Respondus is a software tool provided to all Faculty that can be used to facilitate the development of tests in Blackboard. Tests can be created directly in Blackboard but Respondus allows for "off line" creation of the tests, settings, and preferences...and the the ability to upload these created tests to your course.
In order to use this software you need to install it on your computer and be sure that the version of the software you have is compatible with Blackboard 9.x (see IT for assistance on where to find this software on the KVCC website and how to access the Respondus website to download the patch for 9.x compatibility)
Setting up Respondus to Work with Blackboard Learn
STEP 1: Update Respondus
- After opening Respondus, click “Help” and choose “Check for Updates”
- You should be on version 4.0.5.04
- To check the version, in Responds, choose “Help” then “About Respondus”
- If you are not on 4.0.5.04, please try manually updating Respondus by downloading & installing the following patch:
- http://www.respondus.com/downloads/Respondus4UpdateCampus.exe
- Once you manually update, you will need to re-download the profile settings from Respondus
STEP 2: Download the new Server Settings
- When you are ready to publish, and in the publish wizard, in the drop down next to “Blackboard Server”, choose “Add New Server” and a pop up should appear
- Make sure “Yes, check for preconfigured server settings” is selected, click Next, another pop up should appear
- Choose “Blackboard Learn” from the drop down list, click “Ok”
- Enter in “KVCC Blackboard Learn” in box #1
- Enter in your KVCC userID & password into box #2
- Click “Next”
- Respondus will now test the connection and you at the bottom of the information it displays, you should see “Successful”.
- If you do not, most likely, Respondus is not fully up-to-date; see “Update Respondus” above.
Instructions courtesy of Ryan Connan
Creating Tests
The opening screen shows a number of starting points:
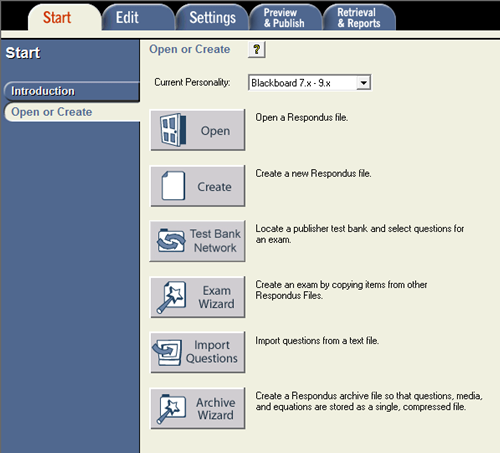
You have a number of options in this screen:
- Open Respondus file - this allows you to open an existing test or database of questions
- Create a new Respondus file - this allows you to create a new respondus test question database and enter your own questions
- Locate a publisher test bank... - this allows you to contact Respondus and find out if they have Respondus-formatted test banks for your textbook
- Create an exam... - this allows you to quickly create an exam from an existing Respondus database
- Import questions from a text file - this allows you to import questions from publisher test banks
- Archive Wizard - this allows you to create an archive to save space on your computer
For the sake of this tutorial we are going to create a test that utilizes a previously downloaded Respondus formatted test bank. The test will be set to randomly select 20 multiple choice questions from the database each time the student takes the test. (This method allows online tests to be created such that students can take the test over and over and get different questions each time. Also, each student gets different questions from the other students.)
We will start by using the "Exam Wizard"
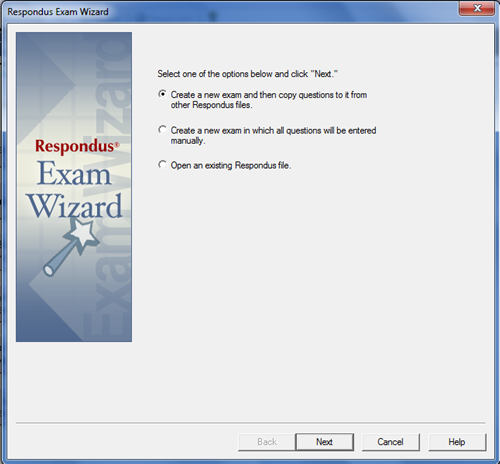
Selecting the Exam Wizard brings up this dialogue...we are going to choose "Create a new exam and then copy questions to it from other Respondus files (NOTE: both created tests and test databases are considered "Respondus files")
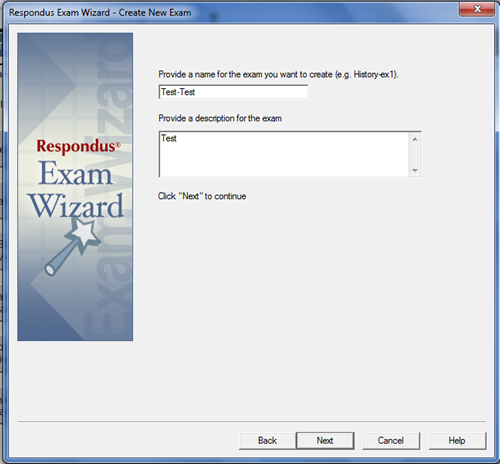
We name the test so we can find it...this test is called "Test-Test" but you might name your tests "Chapter 1 Test" or "Lesson 3 Quiz", or even "Final Exam"
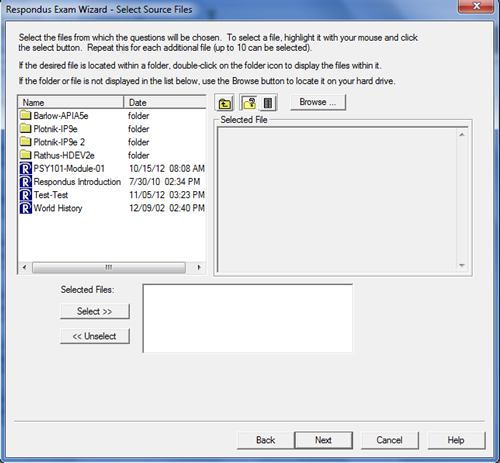
Respondus then brings us to our Respondus files folder...here is where test question databases and previously created tests are stored. You can see the "Test-Test" Respondus file (I created it already when I went through creating this tutorial)
Navigate to the set of questions you want to use...for this test we are going to use the Chapter 1 questions from the Rahtus-HDEV2e test bank.
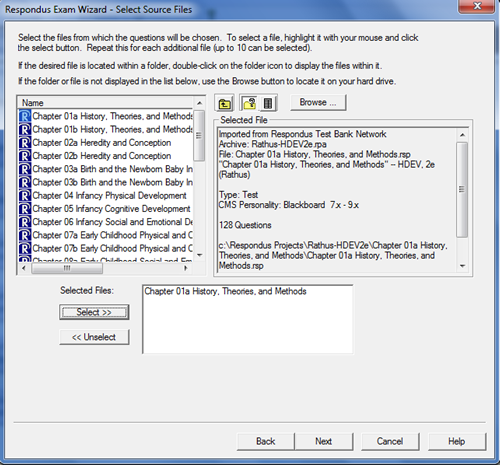
Here I have navigated to the "Chapter 01a History, Theories, and Methods" question bank.
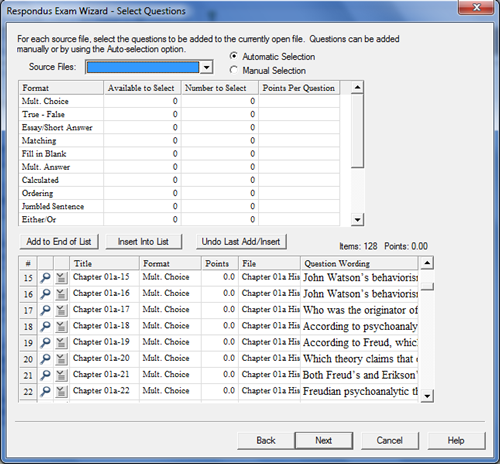
This screen shows a few steps:
- When it first appeared it listed the 128 multiple choice questions in the top table
- I entered "128" in the "Number to Select" column, and then clicked "Add to End of List"
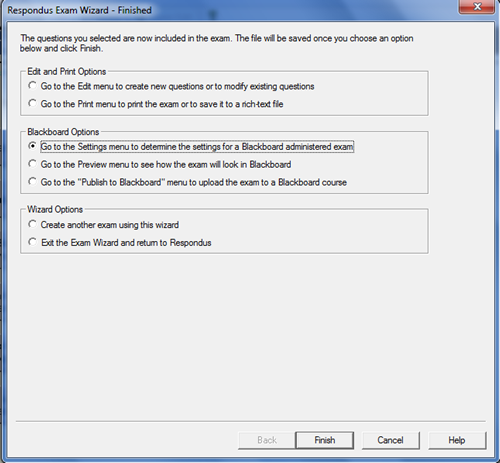
The next screen allows some options. In this case, I selected "Go to the Settings menu to determine the settings for a Blackboard administered exam"
The Settings options are found in the images below
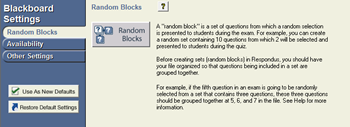
This is used to set up random blocks of test items...we will be using this feature in this example
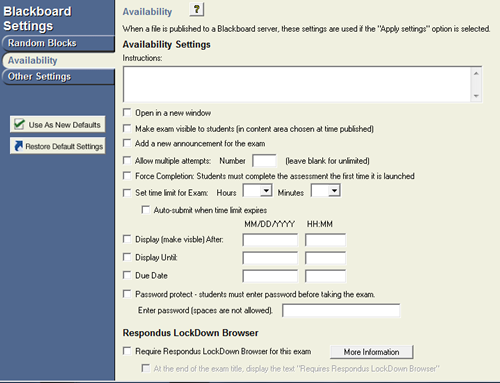
This allows you to set due dates, availability dates, passwords, etc.
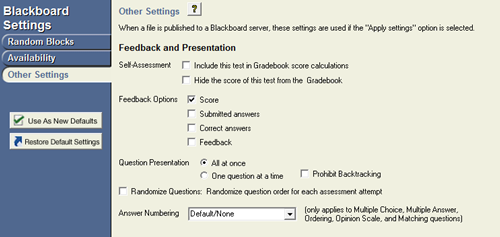
This allows you to determine types of feedback and how the questions are displayed
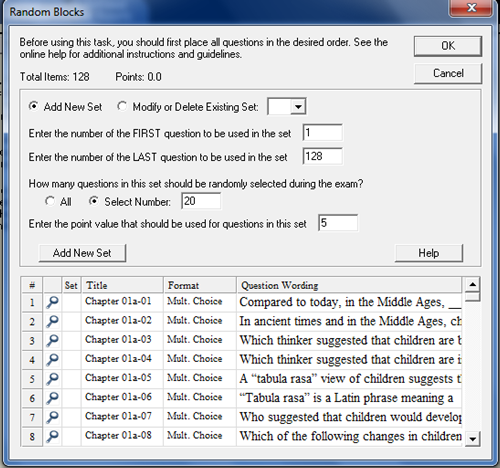
In the Block Settings you can see that I am created a test that will utilize questions 1-128, it will randomly select 20 of them each time a student takes the quiz, and it will score each question at 5 points (for a total of 100 possible points).
I then select "Add New Set" and press "OK"
After I have made the adjustments to the other settings, I want to publish the test to my course.

I select "Publish Wizard" under "Publish to Blackboard" in the Preview & Publish tab.
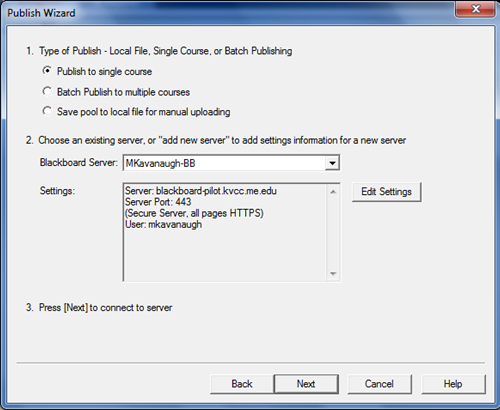
This dialogue allows me to publish the test to one class or to more than one at a time. This screen shows my settings for my current Blackboard account. You may need to press "Edit Settings" to get YOUR account.
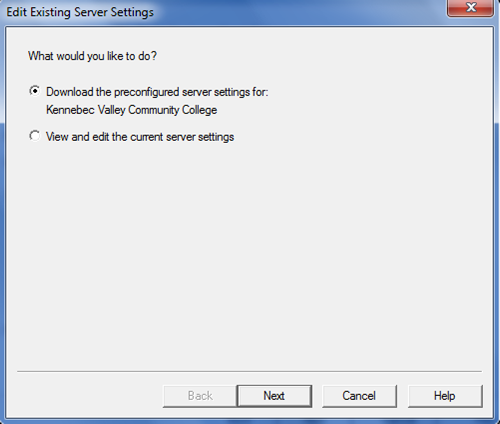
Simply have Respondus look up your settings for you using your Username and Password....once your settings are in you select "Next"
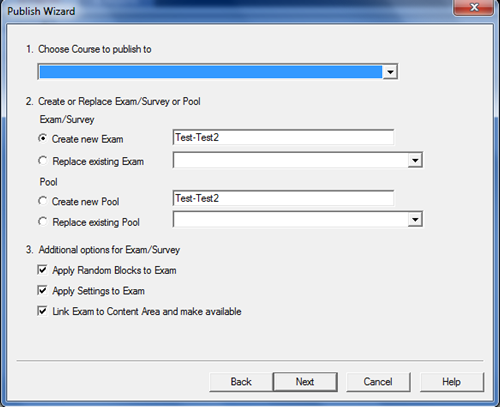
Pressing the blue pull-down menu will reveal ALL the courses in your account.
Select the course you want this test to go to.
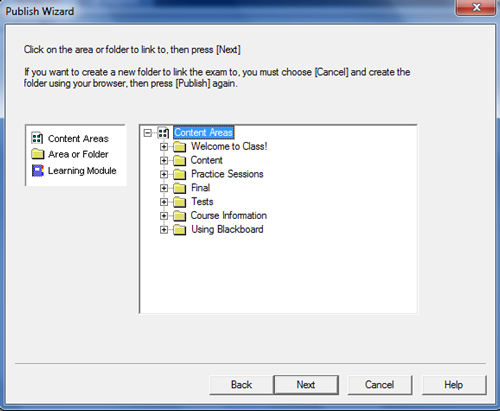
Blackboard 9.x demands that you put the test into an existing Content folder...in this course I have created a content folder called "Tests" and I'm going to load this test into it.
Respondus will then load all the files and settings for your test and you will be able to see it in your course.
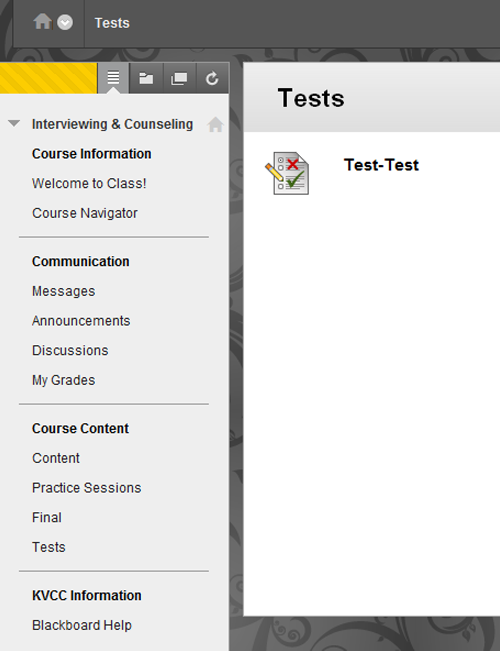
As you can now see, the test titled "Test-Test" now appears in my Content page titled "Tests" (see the menu)