Teaching Online: Documents
Click here to go back to the Menu
Attention
The different types of documents that computers produce is growing every year! We have to be mindful of the types of documents we use in online teaching so that we can be assured that our students can access our material...and so we can be assured that we can access our students material!
Learning Outcomes
-
Identify various file types associated with online learning
-
Consider issues such as file size, universal access, software requirements, and bandwidth in the selection of file types for online learning
Teaching
In this section I want to explore the practice of posting documents to the web for your students to use. Most instructors may want to make certain documents available to all their students, online and face-to-face, through the course website or Course Management Software. The advantage of this is that you can ensure that your students have the most recent version of these documents and they can never really be “lost”. If a student loses the syllabus or the instructions to an assignment, they can simply go to the web and download another copy.
When considering the notion of posting documents to the web you have to contend with decisions about file types. A file type is essentially the type of document you are posting. There are many different types of documents and some lend themselves better to online delivery than others.
Many of you utilize a word processor such as Microsoft Word, Microsoft Works, or Apple’s Pages program. These applications save their files in specific formats with file extensions on them that you might recognize (such as .doc and .docx for the different versions of MS Word). This is an example of a file type, such as Microsoft Word or a .doc file.
When you are considering file types for the files you send to your students you might keep the following thoughts in mind:
-
Do your students need any special software to view the file when they access it?
-
Can you ensure that ALL your students will have this software if they need it?
-
Are the files large in size (meaning, will it take a long time to download them)?
-
Will your students be accessing your course materials from a variety of computers (thus they may not have the specific software they need)?
The answer to these questions, in my mind, is simple...use file formats that require software that is free and universal, provide a way for your students to download any special software, stick to small file sizes, and utilize web-based file formats whenever you can! So here are some tips on how to do just that!
Document File Types
Document files include those like your syllabus, instructions, outlines, handouts, and grading rubrics that you might want your students to have. If you create these yourself you can use any software that you feel comfortable using but there are only a few file types that meet the criteria above, Portable Document Files (PDF), Rich Text Format (RTF), and Web Pages (HTML). By using these types of files you maximize the ability for your students to view the documents from any where they may be. Let’s take a look at each of these.
Portable Document Files
PDF is a file type that was developed by Adobe, the same company that gives us Photoshop. The origins of the PDF file type is in the print industry at the birth of desktop publishing. Designers and layout experts wanted to be sure that what they did on their computer actually got printed when they sent the file to the print shop. This included fonts, pictures, colors, and the layout of the document.
PDFs store all this information so that just about any computer, with the right software, can open the file and see it exactly like you designed it! This is great for forms and documents with complex layouts.
To view PDF files you need software that can open PDF documents! Adobe, of course, has the Adobe Acrobat Reader. This is a free program that is included with most computers already. Adobe Acrobat (not the reader) is a program that can be purchased that allows the user to create complex PDF files directly and can include audio, video, and forms to fill out.
Other programs can view PDF files as well, including Apple’s Preview software that comes with every Mac. In addition, when you download the software it automatically updates your web browser software so that you can view PDF files right in your web browser!
In order to create a PDF file you need to have Adobe Acrobat. However, many modern operating systems, such as Windows Vista and beyond, and any version of the Mac OS has PDF creation built in. If you have your document in the program that you created it in you can often simply go to the Print menu and select PDF to “print” the file into a PDF format. It will not send it to a printer, it will ask you to select a location on your computer to save the file and will add a .pdf extension to it. Uploading this type of file will enable your students to view and print them from nearly any computer in the world.
Rich Text Format
RTF files are also fairly universal file formats for text documents. RTF was developed as a standard file format for all word processors on all platforms so that individuals can share files. As the name implies, the RTF format enables you to format a file with headings, bold face type, bullet points, and other important layout features. RTF files can be created, opened, and edited by nearly every word processing program in the world.
There are some limitations to the RTF format. Tables, images, and any “macros” that are part of an original document may not translate well when it is converted to RTF. The advantage of RTF over PDF is that the RTF can be edited by the person who receives it. Unless a student has Adobe Acrobat, or another PDF editing program, they cannot change the PDF file.
To create an RTF file from your word processor is equally simple. You select the “Save As...” option and click to view the various file formats you can create. Select RTF or Rich Text Format and the program will ask you to save the file somewhere on your hard drive. It will save the file with the .rtf extension on it. If you send these files to your students they will be able to open and edit the files with their word processor regardless of what program they have.
RTF is also a useful format for your students to use to send files to you! If you are assigning written work without much more than the basic layout features you can have your students send RTF files to you and avoid the headache of having to deal with different word processing programs and their file formats among all your students.
HTML Documents
These files comprise the last category I’ll discuss here. These are, by far, the best for viewing on the web because they are, in fact, web pages. But they are tricky and they require special considerations when you are using them. I’ll explain.
HTML stands for “Hypertext Markup Language” and was developed by Tim Berners-Lee in 1992, the same guy who REALLY invented the Web! Revolutionary at the time, the term “hypertext” refers to the ability to create a document that would have special tags that would allow a reader to click a word and jump to another part of the same page or to another page all together. Today this is commonplace and it is the essence of what we experience on the web.
Visit this website for a full, and actually very interesting history of the web and HTML
http://www.w3.org/People/Raggett/book4/ch02.html
Many word processing programs can create HTML documents, but the best way to create an HTML file is to use a program that is designed to do just that!
At the beginning of all this editing HTML was like programming code on a computer. You had to use special language to define where text would appear on a page. As the code evolved we started to be able to include images, links to other sites, and even media in the pages. (Today with advanced HTML code our pages can be interactive and can be programmed to respond to the reader...very cool stuff!)
However, not many people want to learn the HTML language so they can post some instructions or a story online...so, there arose a demand for programs that made it easy to design web pages (HTML documents). There are lots of them, some are free, some can cost a lot of money. Most have features you will never use, but all try to make the design of web pages easier by incorporating a technology called WYSIWYG (pronounced Why-See-Wig)! This literally stands for What-You-See-Is-What-You-Get!
These programs allow you to type text, insert pictures, create tables, and other layout elements just like you would in a word processor. There are some differences between word processing and HTML editing, but the programs are so varied it is really something that you need to explore in your HTML editing program.
There is, however, one important difference between HTML and, let’s say, PDF, when it comes to images and other elements that you have inserted into your document. I’ll give you an example:
Let’s say you want to post a document that provides a picture of the anatomical structure of the eye and a list of anatomical parts with definitions as a study guide.
You can create this in a word processor, insert the picture of the eye in the right spot, “print” the file to PDF and upload the file to your website...no problem (and likely the best way to deliver a document like this!)
If you create the file in an HTML editor it is a different story.
When you use a WYSIWYG editor it “looks” like you have added an image to your document, but you really haven’t. Underneath what you see is programming code (the HTML stuff) and the way that works is that the CODE tells your WEB BROWSER to insert a FILE (the image) in that spot. So, your web browser has to also be able to find the image file of the eye!
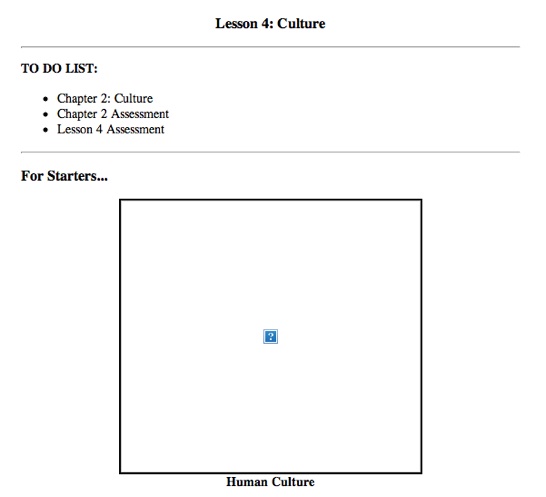
When you create an HTML file with images in it you actually have to keep all the original image files and load those to your website as well...AND, you need to be sure that the underlying code that tells your web browser where to find the image file remains consistent or the link will be “broken”...we all know what a broken link looks like on a web page!
Here is an example of a web page that has a broken image link:
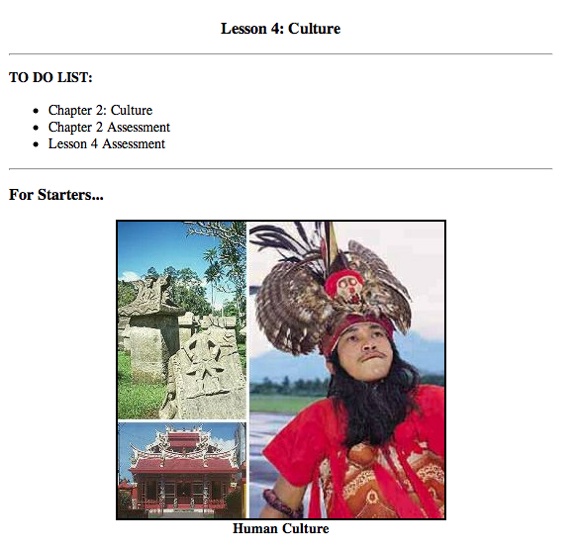
Here is the same page with the link fixed....the browser can now locate the image file and inserts it into the correct spot.
There are VERY clear advantages for using HTML documents in your courses...they can be viewed from anywhere in the world, they can contain images, movies, sound, etc, and they can hypertext your students to other resources on the web such as websites, online media, and other technologies.
But...it takes some expertise to make sure that they work great and contribute to a positive experience for your students.
That said, I have a recommendation. As a web designer for over 10 years I use a product called Dreamweaver from Adobe. Dreamweaver is a highly advanced professional level HTML editor but it is also intuitive and relatively easy to use. It may take some time for you to become proficient at designing web pages, but the payoffs can be great for your students and for you!
When you are posting documents to the web it is important to consider a couple factors about your audience:
-
Connection Speed (modem, cable, DSL, etc.)
-
Computer Operating System (Windows XP, Windows VISTA, Mac OS, Linux, etc.)
-
Applications (word processing, browsers, plug-ins, etc.)
Connection Speed
When you are developing on your home computer your computer can usually access your files very quickly. When your students access these files they are usually downloading them from a remote server to their own computer. This involves a complex network of computers we call the “Internet” which utilizes protocols to send information from one computer (the Blackboard server at KVCC) to the students home computer.
Some of your students will have very fast connections through DSL, Cable, or maybe even faster if they are on an office network with T1 or other access. Getting files is not a problem for these folks.
However, sometimes the internet is “slow”...even with cable and DSL, so it is important that you keep in mind the file size of the documents you place on Blackboard.
Text is usually not a problem, but pictures, sounds, and in particular, animations and movies can be very large. Be sure to check the file size of the documents you are considering before you submit them to your course.
A common problem is when you import images and graphics into a word processing program. On your computer it opens right up, but it may take a very long time to download. Sometimes you can “right click” images in a document and ask the computer to “compress” all the images in the document to make them small but still look good. You still want to check the file size before you send it.
If you have a lot of media to send to your students consider having the IT department put together a CD which they can then sell through our Campus Bookstore. The same applies to large documents that you may want your students to have...the Bookstore offers a service where they will make “course packs” for your students. This saves a lot on printing time, download time, and overall frustration!
Computer Operating Systems
Although it is a reality that most computers are operating some form of Windows, it is not the only operating system on the planet. The document you are reading right now was written on a Macintosh computer.
Modern operating systems are pretty much the same (setting aside the age-old arguments for the moment!). They function to organize files, display them on a screen, and allow you to manipulate them. They also provide a platform to run applications (programs) that allow you to do these things.
For the most part you don’t have to worry much about Operating Systems because for the most part they all play well together and understand each others files. However, sometimes they don’t.
It is advisable that you not assume that your students have the same kind (or quality) of computer that you have so you want to reduce the course needs to the minimal requirements possible. Basic emailing, attachments, word processing, taking quizzes online, internet searches, and participation in discussion boards are all basic functions that nearly any operating system.
However, some of you might want to use specific software (Excel, SPSS, etc.) or may demand specific tasks (make a movie, presentation, web site). You will have to familiarize yourself with what is available on different platforms so that students can accomplish these goals on the systems they do have (see below for more information on applications in regard to file types).
Applications
Your students will need to have access to specific applications (programs) that run on their computer in order to access your material. I will list some of them below and discuss their importance in terms of file types (if they are going to open your documents or send you documents)
Browsers
Browsers allow students to look at web pages and to navigate the Blackboard interface
When you log on Blackboard it does a browser check to be sure that you have a modern enough browser with the correct version of JavaScript built in. Blackboard will provide you with feedback about this when you log in
Blackboard will also check to make sure that you are able to view “pop up” windows. Many people turn off this functionality to avoid advertising on the internet, but they will need to turn it on to use Blackboard
Plug-ins
To add functionality to a browser you often have to add Plug-ins
Some of the most common Plug-ins that you can get for your browsers include Flash, Shockwave, QuickTime, Windows Media, and Adobe Acrobat
If you are planning on posting content in these formats be sure to provide your students with links to the appropriate software (these are all free downloads)
Word Processing
There are many, many word processing programs out there. These programs allow individuals to type documents, and often, insert charts, tables, and pictures.
-
Microsoft Word
-
Microsoft Word is the predominant word processor in the world.
-
Office 2007 (the newest suite of applications that includes Microsoft Word) has a compression file format for Word documents that has a file extension .docx
-
Older versions of Office (and Word) had a .doc file extension
-
To read .docx files you either have to have the new version of Word or you have to download a converter from Microsoft to allow older versions of Word to read the files.
-
Users of the new Word (.docx) can also save their documents as regular .doc files to make it easier for more folks to see their files.
Other Word Processing Applications
Some of the other word processors out there include the following:
-
Microsoft Works
-
Word Perfect
-
Pages (Mac only)
-
Apple Works
Many of these applications are fine for writing papers but will have to be converted to other standard formats so that everyone can read them.
It is recommended that they convert their files to “Rich Text Format” (it will have the file extension .rtf)
If you POST Rich Text Format files you can be assured that ALL word processors will be able to read the documents
Presentation Software
Presentation software allows a student to create a slide show consisting of text, charts, images, etc.
Microsoft PowerPoint is the predominant presentation software (the Apple iWorks application suite has an application called Keynote that does the same thing)
Presentations can be posted in a course, but I’m not sure why one would want to do that...presentations are designed to emphasize specific key points and assume that they will be accompanied by a verbal presentation or handouts. Standing alone they are nothing more than a pretty fancy outline...better to just create a fancy outline in a word processor than to post your PowerPoint slide show
PowerPoint (and Keynote) presentations can often be saved as movies and web pages, often with accompanying audio! Check your documentation that came with the application and be sure to keep file size in mind.
Course-Specific Software
Sometimes you may want your students to have specific software to use in the class.
An example of this might be a statistics class that requires students to have SPSS (or, in a pinch, Excel)
Be sure that you specify this early in the course so that students will have an opportunity to get the software.
If you include the software as a requirement for your class it is likely that students can use their financial aid to get it.